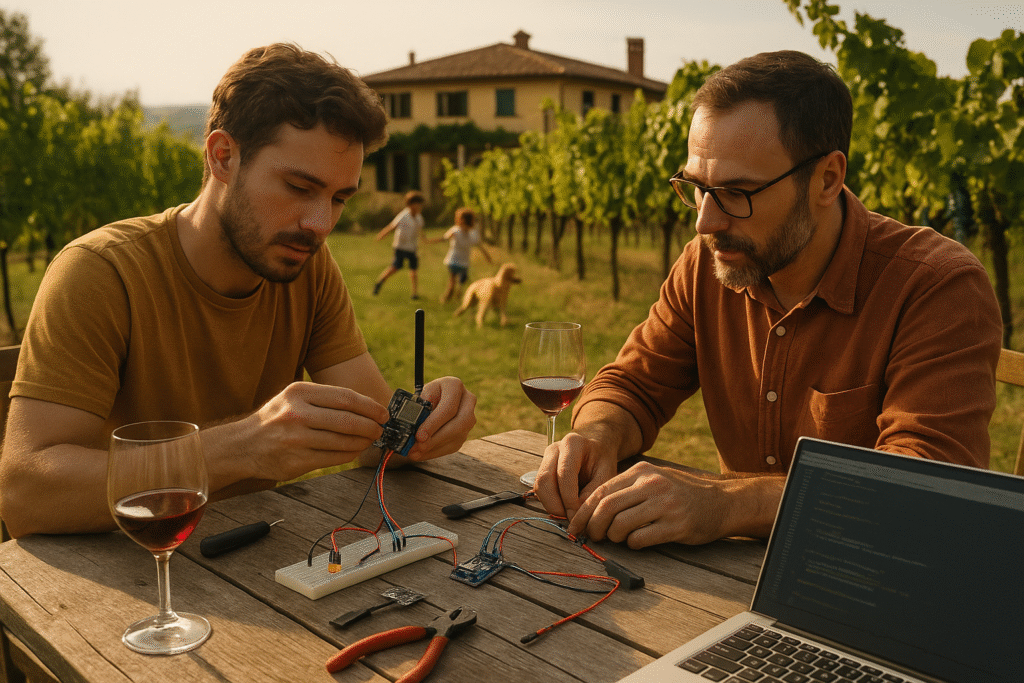
Last year, my family and I spent a few days in Italy, staying at a small vineyard in the countryside. It wasn’t anything fancy—just a few guest rooms, a stunning view of the hills, and some of the best wine I’ve ever tasted. What made it truly memorable, though, were the people. We got to know the owner, a relaxed and passionate guy in his 50s who ran the vineyard mostly by instinct, tradition, and feel.
After a few long dinners (and more than a few glasses of red), we started talking about how he manages the vines—especially during the hot, dry parts of the year. He admitted that he still walks the rows, checks the soil by hand, and keeps a mental log of weather changes. “It’s worked for years,” he said with a shrug, “but I wouldn’t mind something a little smarter.”
That’s when the idea started brewing.
I didn’t come to Italy planning to build anything. But I had my ESP32 gear in my bag (because of course I did), and I’d recently been experimenting with LoRa. The vineyard fields didn’t have strong mobile coverage—but there was surprisingly solid Wi-Fi around the house and nearby shed. That was just enough to get me thinking: what if we could use a low-power LoRa sensor network to collect data from the field, and then upload it via Wi-Fi once it reached the house?
Over the next few days—between sightseeing and sipping wine—we built a working prototype using ESP32 boards with LoRa radios. The system collected temperature, humidity, and soil moisture data from multiple spots across the vineyard. A gateway node near the house received the packets and uploaded them to ThingSpeak for remote viewing.
It wasn’t polished, and it definitely wasn’t planned. But it worked—and it proved that even in a laid-back, offline-looking place like this, smart monitoring was entirely possible with some off-the-shelf boards and a bit of code.
In this article, I’ll walk through how we built this real-world ESP32 LoRa sensor network in rural Italy—what gear we used, how we handled power and connectivity, what went wrong, and what actually worked. If you’re thinking about deploying low-power sensors in a remote or semi-connected environment, I hope this story gives you a useful head start.
Table of Contents
- Why We Chose LoRa for the Vineyard
- The ESP32 LoRa Sensor Network Setup
2.1 Sensor Nodes
2.2 The Gateway - Field Challenges and Lessons Learned
- How the Data Looked
- Final Thoughts
1. Why We Chose LoRa for the Vineyard
Once we got the idea to start collecting some basic environmental data from the vineyard, the next question was: how do we actually move the data from the field to somewhere useful?
The vineyard had decent Wi-Fi around the main house and shed—but that signal didn’t reach out into the rows of vines, where we actually needed the sensors. Running cables across the property wasn’t an option, and setting up a mesh network or mobile data link felt like overkill for a weekend experiment.
That’s where LoRa came in.
I had been experimenting with ESP32 LoRa boards back home, and this seemed like the perfect excuse to put them to work. These boards are affordable, easy to code, and designed for long-range, low-power communication—exactly what we needed. LoRa can transmit data reliably over hundreds of meters, even through light vegetation and mild elevation changes. In our case, we were aiming for a 400–500 meter range, with mostly flat terrain and a few trees.
The idea was simple: have several battery-powered sensor nodes scattered across the vineyard. Each one would collect temperature, humidity, and soil moisture data, and send that information via LoRa to a central gateway node near the house—within Wi-Fi range. From there, the data could be uploaded to a cloud service like ThingSpeak, giving us remote access to live readings with zero infrastructure in the field.
LoRa’s simple point-to-point setup meant we didn’t need to mess with complex networking. Each node just woke up, took a reading, sent it, and went back to sleep. That kept power usage incredibly low—perfect for running on small solar panels and 18650 cells.
It wasn’t just about range—it was about flexibility, simplicity, and the ability to actually do something with the data once it arrived.
2. The ESP32 LoRa Sensor Network Setup
We didn’t start with a grand design. The goal was simple: get one ESP32 LoRa node talking to a receiver and test the range. Once we had that working reliably, we began adding more nodes to cover different parts of the vineyard.

Everything was kept as simple and modular as possible—no custom PCBs, no cloud dashboards, and no overengineering. Just real-world testing with real data.
2.1 Sensor Nodes (Expanded with Technical Details)
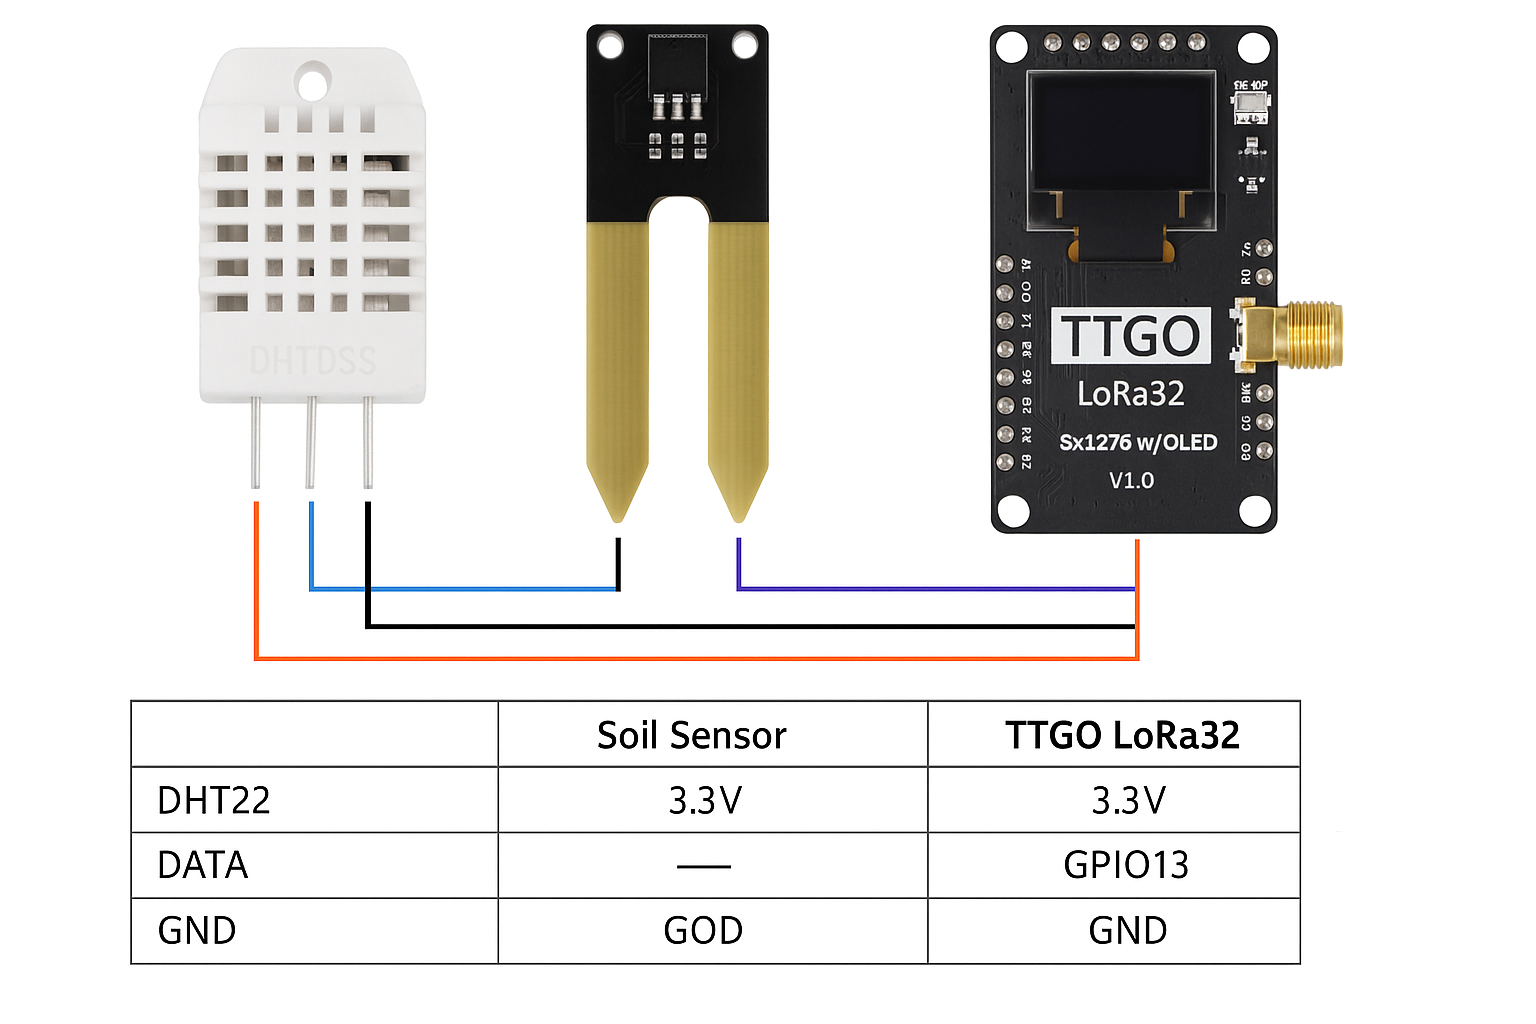
Each sensor node was built around the TTGO LoRa32 (V1.0) board. It comes with an onboard SX1276 LoRa transceiver and an OLED screen. We used it with:
- DHT22 sensor for temperature/humidity
- Capacitive soil moisture sensor (analog type, better long-term durability than resistive)
Wiring Diagram
Here’s how we wired it all up:
DHT22]              [Soil Sensor]             [TTGO LoRa32]
  VCC  ---------------- 3.3V          ——→         3.3V
  GND  ---------------- GND           ——→         GND
  DATA ----------------               ——→         GPIO 13
  AOUT --------                       ——→         GPIO 34 (ADC)
⚠️ Note: Use a voltage divider or ADC-capable pin for soil sensor. GPIO 34 is input-only and perfect for analog readings.

We didn’t use the onboard OLED in the final deployment to save power, but it was useful during testing.
Power and Deep Sleep Strategy
Power came from a single 18650 Li-ion cell, charged via a TP4056 board with solar input. We connected the battery to the 3.3V line via a diode to prevent reverse current. Here’s the real-life power profile:
- Active transmission: ~120–130mA for ~300ms
- Deep sleep: ~10µA
- Wake interval: every 15 minutes

To keep the node running for days without sun, we limited activity to ~2s per cycle.
Code Snippet: Basic LoRa Sender with Sleep
#include <SPI.h>
#include <LoRa.h>
#include "DHT.h"

#define DHTPIN 13
#define DHTTYPE DHT22
#define SOIL_PIN 34

DHT dht(DHTPIN, DHTTYPE);

void setup() {
  Serial.begin(9600);
  dht.begin();

  LoRa.begin(868E6);  // Frequency for EU

  float temp = dht.readTemperature();
  float hum = dht.readHumidity();
  int soil = analogRead(SOIL_PIN);

  String payload = String(temp) + "," + String(hum) + "," + String(soil);
  LoRa.beginPacket();
  LoRa.print(payload);
  LoRa.endPacket();

  esp_sleep_enable_timer_wakeup(15 * 60 * 1000000); // 15 mins
  esp_deep_sleep_start();
}

void loop() {
  // not used
}
🧪 Tip: Add error handling and sanity checks for DHT readings. It sometimes returns
NaNon wake.
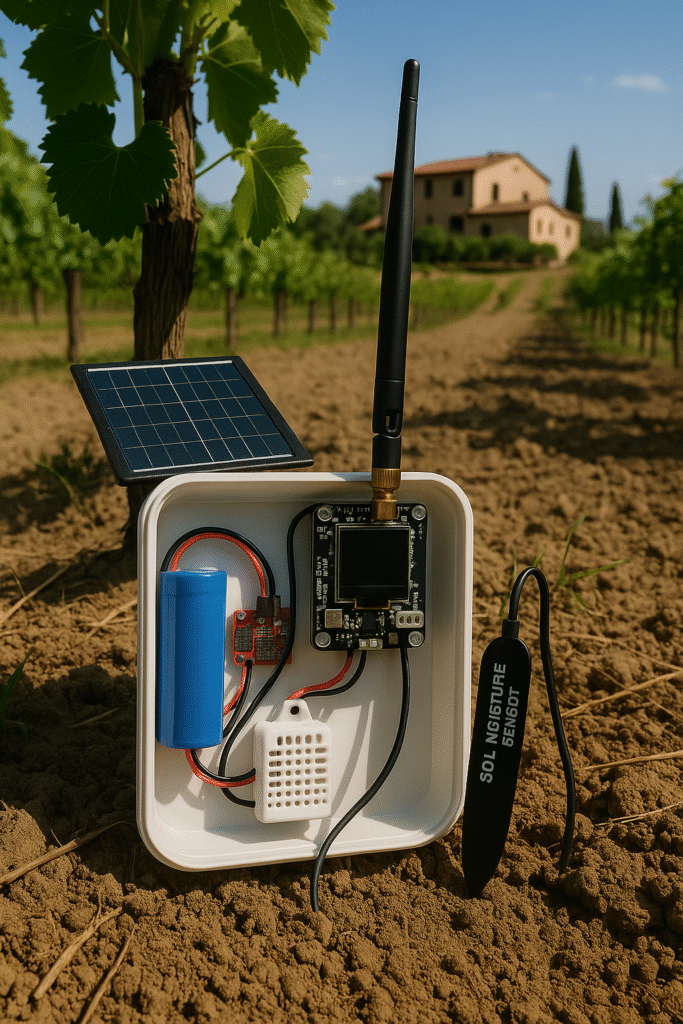
We didn’t have IP-rated boxes on hand, so we improvised with food containers and added:
- A hole for the soil sensor cable, sealed with hot glue
- Silica gel packets inside
- Tiny 1mm holes on the bottom to drain condensation
- Solar panel zip-tied to the lid
2.2. The Gateway
While the sensor nodes focused on saving power and waking only to transmit, the gateway node had a different role: stay powered, listen for incoming LoRa packets, and push the data to the cloud. We built it using the same TTGO LoRa32 (V1.0) board, this time powered over USB and connected to a laptop inside the main house (we also tested it later with a Raspberry Pi, which worked just as well).
Because the house had decent Wi-Fi, it made sense to take things one step further and upload the data to ThingSpeak API. That way, we could view live graphs of temperature, humidity, and soil moisture—on our phones, from anywhere—without setting up our own server.

LoRa Configuration
The beauty of LoRa is that the receiver doesn’t request anything—it just listens on the right settings and catches anything sent in its direction. Once a node wakes up and transmits, the gateway picks it up—assuming the settings match:
| Setting | Value |
|---|---|
| Frequency | 868 MHz (EU standard) |
| Spreading Factor | 7 |
| Bandwidth | 125 kHz |
| Coding Rate | 4/5 |
| Sync Word | 0x34 (optional, helps filter packets) |
🔍 You can tweak these settings depending on your range and power trade-offs. Semtech’s LoRa Design Guide is worth a look if you’re optimizing for distance or signal quality.
Wiring
This part was almost too simple:
[TTGO LoRa32 Gateway]
  USB  ------→  Laptop or Raspberry Pi
We didn’t use the onboard OLED in the final version, but it was helpful for debugging during early tests by displaying live packet data.
If you want to go off-grid, you could run this setup on a power bank. Otherwise, just keep it plugged into your dev machine or a Pi.
Code Snippet: LoRa Gateway with Wi-Fi Upload to ThingSpeak
Here’s what the gateway code looked like once we added Wi-Fi and ThingSpeak integration:
#include <WiFi.h>
#include <HTTPClient.h>
#include <SPI.h>
#include <LoRa.h>

// Wi-Fi credentials
const char* ssid = "YOUR_WIFI_SSID";
const char* password = "YOUR_WIFI_PASSWORD";

// ThingSpeak API
const char* server = "http://api.thingspeak.com/update";
String apiKey = "YOUR_THINGSPEAK_WRITE_API_KEY";

void setup() {
  Serial.begin(115200);
  WiFi.begin(ssid, password);
  while (WiFi.status() != WL_CONNECTED) {
    delay(500);
    Serial.print(".");
  }
  Serial.println("WiFi connected");

  LoRa.begin(868E6); // Match frequency
  Serial.println("LoRa Gateway Ready");
}

void loop() {
  int packetSize = LoRa.parsePacket();
  if (packetSize) {
    String payload = "";
    while (LoRa.available()) {
      payload += (char)LoRa.read();
    }

    Serial.println("Received: " + payload);

    // Parse comma-separated values
    float temp, hum;
    int soil;
    sscanf(payload.c_str(), "%f,%f,%d", &temp, &hum, &soil);

    // Send to ThingSpeak
    if (WiFi.status() == WL_CONNECTED) {
      HTTPClient http;
      String url = String(server) + "?api_key=" + apiKey +
                   "&field1=" + String(temp) +
                   "&field2=" + String(hum) +
                   "&field3=" + String(soil);

      http.begin(url);
      int httpCode = http.GET();
      http.end();

      Serial.print("HTTP Response code: ");
      Serial.println(httpCode);
    }
  }

  delay(1000); // Slight delay before next loop
}
✅ Tip: If you’re using a Raspberry Pi instead of an ESP32, you can try pyLoRa or hook the LoRa board to USB and parse incoming serial data using Python, Node-RED, or even a local SQLite DB.
Real-World Range
Our layout was mostly flat, with some trees and rows of vines between nodes and the gateway. Even with the stock LoRa antennas, we achieved about 500 meters of reliable range (line-of-sight). We didn’t use directional antennas or ground planes, but range could be improved further with tuning.
3. Field Challenges and Lessons Learned
Building a DIY sensor network in a vineyard sounds great on paper—but the real world has a way of exposing all your weak points. Here’s what didn’t go as planned, and what we learned from each issue.
Sensor startup issues
We used DHT22 sensors for temperature and humidity. While they worked well most of the time, we ran into a problem where the sensors would sometimes return NaN (not a number) right after the ESP32 woke from deep sleep. This seemed to happen more frequently in cooler, early-morning conditions.
What we learned:
The DHT22 sometimes needs a bit of time to stabilize after waking up. Adding a short delay and a retry loop after dht.begin() improved reliability significantly.
Solar power struggles
Each sensor node ran on a single 18650 cell charged with a small solar panel. In ideal sunlight, this worked perfectly. But on cloudy days, especially after multiple transmissions, one of the nodes didn’t make it through the night.
What we learned:
Power budgeting matters more than we thought. Even with deep sleep drawing only around 10 µA, short transmission bursts (~130 mA) add up. A bigger solar panel or a longer sleep interval would help in low-light conditions.
Occasional packet loss
LoRa is excellent for long-range, low-power communication—but it’s not magic. We noticed occasional data packets didn’t make it to the gateway, especially when more than one node tried to send data at nearly the same time.
What we learned:
Simple point-to-point LoRa doesn’t manage collisions. Staggering each node’s transmission with a small delay (based on node ID or a bit of randomness) helped reduce dropped packets.
Makeshift weatherproofing
We didn’t have weatherproof boxes, so we used plastic food containers, hot glue, and silica gel. For the most part, this worked. But after a cold night, one box collected condensation inside, which briefly caused the soil sensor to short out.
What we learned:
Even basic enclosures need ventilation and moisture control. Adding tiny drain holes on the bottom helped. For future builds, we’d use vented enclosures or pressure-equalizing stickers to let moisture escape safely.
Debugging in the field is hard
During testing, we relied on Serial output and the OLED screen. But crouching in a dusty vineyard with a laptop balanced on your knee is not ideal.
What we learned:
A simple LED blink or OLED status message goes a long way. Visual cues like “TX OK” or error codes would make in-field testing faster. If we had added SD card logging, it would have helped even more.
Overall takeaway
Despite the hiccups, every issue gave us insight into what works and what doesn’t when you take IoT off the desk and into the dirt. This wasn’t a perfect deployment—and it didn’t need to be. It was a test, and a successful one.
4. How the Data Looked
After setting up the network, we let it run for just over three weeks. Each sensor node woke up every 15 minutes, collected data, transmitted it via LoRa, and went back to sleep. The gateway received these packets and uploaded them to ThingSpeak, where we could visualize the data in real time.
Here’s a slice of data collected during one morning cycle from a single sensor node:
| Date | Time | Temp (°C) | Humidity (%) | Soil Moisture (ADC) |
|---|---|---|---|---|
| 2024-07-10 | 08:00 | 22.4 | 68 | 312 |
| 2024-07-10 | 08:15 | 23.1 | 65 | 309 |
| 2024-07-10 | 08:30 | NaN | NaN | 306 |
| 2024-07-10 | 08:45 | 25.5 | 58 | 303 |
| 2024-07-10 | 09:00 | 26.7 | 55 | 300 |
| 2024-07-10 | 09:15 | NaN | NaN | 296 |
| 2024-07-10 | 09:30 | 29.2 | 50 | 292 |
What we observed:
- Temperature and humidity values were mostly stable, with predictable warming and drying as the sun rose.
- Soil moisture dropped gradually, which made sense as ground surface evaporation increased mid-morning.
- Two data points returned
NaNfor temperature and humidity—these were DHT22 misfires that occurred immediately after the ESP32 woke from deep sleep.
This issue wasn’t constant, but it was frequent enough to be noticeable in the logs. We suspect the DHT22 needs a bit more time to stabilize after waking up.
Things to improve:
- Adding a short delay (e.g. 100–200 ms) before reading from the DHT22 might reduce errors.
- Implementing a retry mechanism (e.g. try 2–3 times with delays between) could smooth out noisy readings.
- For critical deployments, we might consider using BME280 or SHT31 sensors, which tend to be more stable under low-power sleep/wake cycles.
Despite occasional hiccups, the system worked. And these kinds of issues are part of the reality of low-cost sensor networks. Spotting them early helped us shape what a more robust version of this project could look like.
5. Final Thoughts
This project started with a casual conversation over wine, but it turned into a practical, working prototype that proved just how accessible low-power IoT has become. With a few ESP32 LoRa boards, some basic sensors, and a little bit of patience, we built a functional sensor network in a rural vineyard—with no permanent infrastructure and almost no budget.
Was it perfect? Definitely not. We ran into sensor hiccups, power hiccups, and plenty of real-world surprises. But that was part of the fun. The fact that we could monitor soil moisture, temperature, and humidity from across the field—and log that data to the cloud via a Wi-Fi-connected gateway—felt like a small but meaningful win.
If you’re working on something similar, here’s what I’d leave you with:
- Keep things modular. Don’t over-optimize too early.
- Power management is more important than fancy features.
- Field testing always reveals something you missed on the bench.
And most of all—have fun with it. Whether you’re building smart agriculture solutions or just experimenting in your backyard, the tools are out there and more accessible than ever.
If this helped or inspired your own project, let me know. Or better yet—share what you build.

